I wanted to thank Kristin for featuring me in her newsletter. I made a doll using a santos doll form. Check out her blog and my feature in her article.
Thanks!
http://www.krishubick.blogspot.com/2013/12/santos-cage-dolls-free-gift.html?m=1

I have a deep passion and drive to create art that will make someone smile, and my studio allows me to do this. Having a dedicated studio space allows me to tap into my artistic side and provides a refuge from the world. My area of expertise is making unique cards and tags with a distressed vintage feel by intentionally fading and marring my work. My proudest moments as an artist are when I hear and see how my creations have lifted other peoples spirits.
Sunday, December 29, 2013
Thursday, December 19, 2013
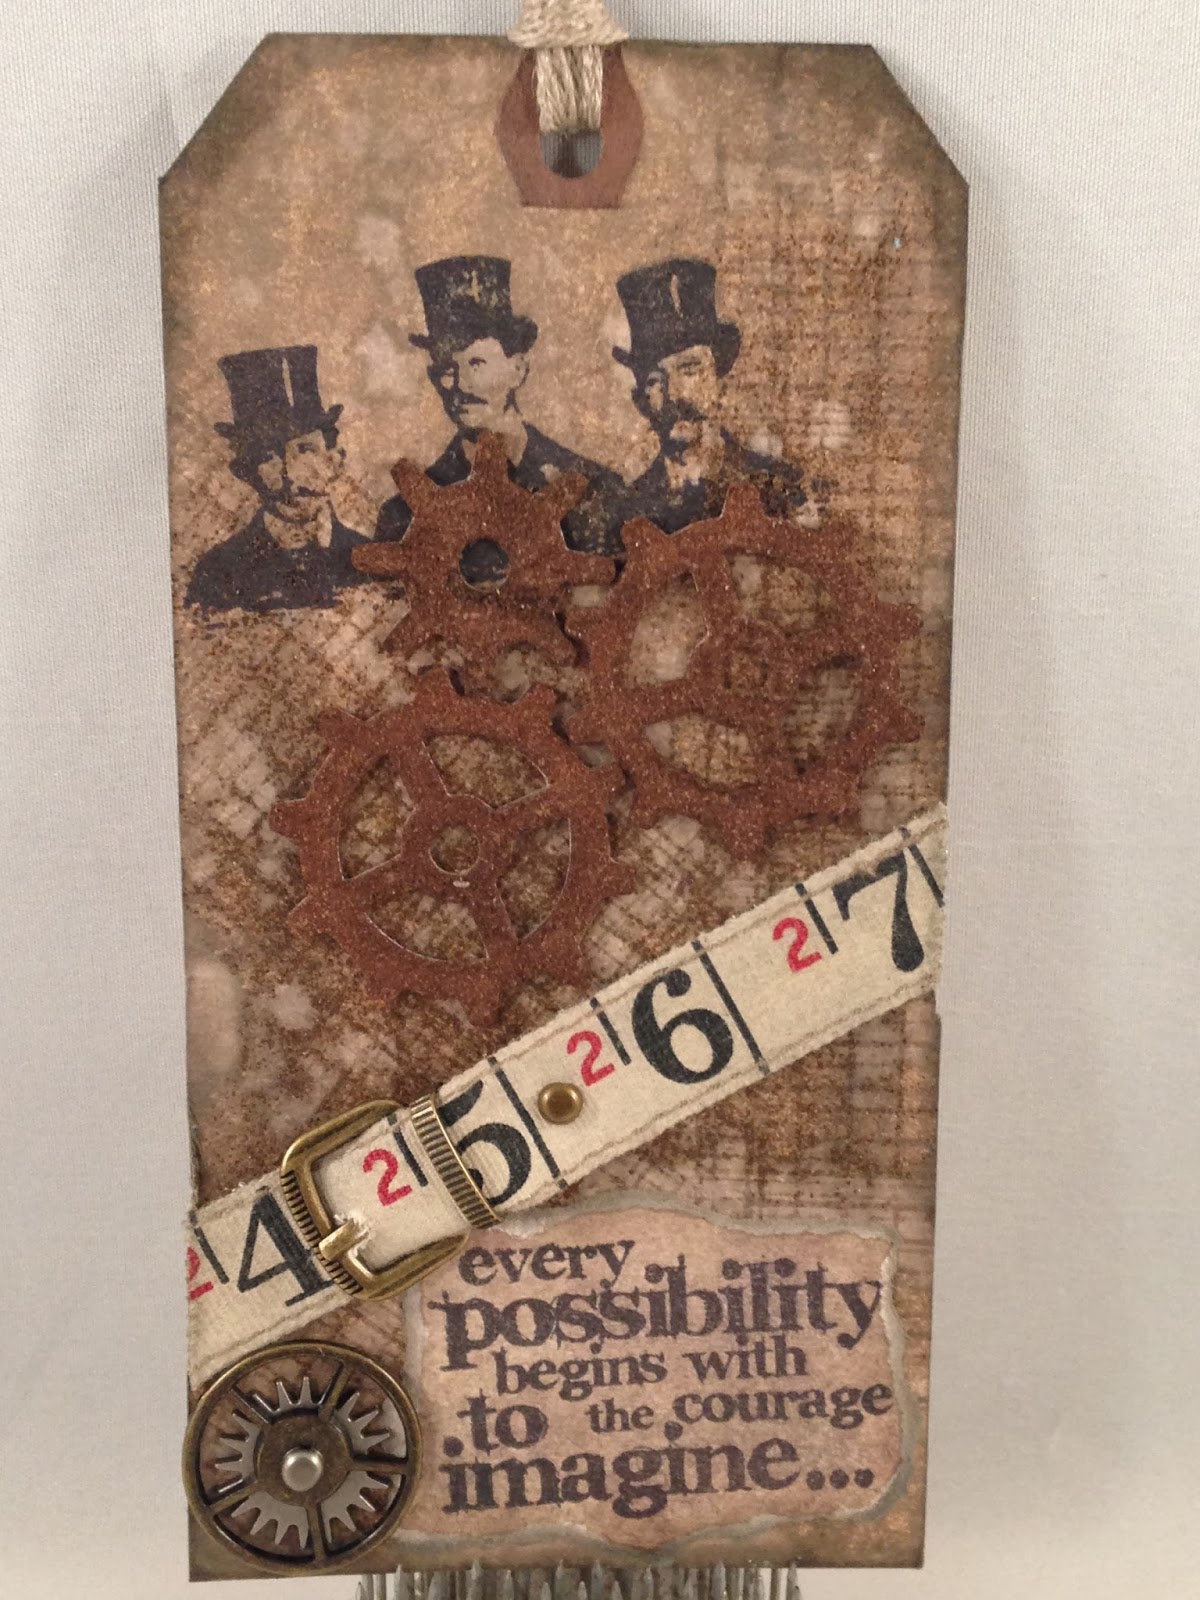
December Tag Swap Tim Holtz themed
I was in a swap in December that the theme was Tim Holtz. Here is the tag I made for my partner Kathy Peck. She loved it and so glad.
I utilized all Tim products and a technique learned in creative chemistry 2.

I hope you like and thanks for stopping by my blog.
- Posted using BlogPress from my iPhone
I utilized all Tim products and a technique learned in creative chemistry 2.

I hope you like and thanks for stopping by my blog.
- Posted using BlogPress from my iPhone
Sunday, December 15, 2013
Doll project Dec2013
Over several months ago I was out just browsing designer pages. I stumbled across Jim Hankins page and found this amazing doll he made. It gave me an idea to make my sister a doll and then I had the desire to make my own doll project. I completed and gave my sister her doll and have been trying to figure out what my doll theme and piece would be.
I first had to go out and purchase another doll form and I was able to find another one at Tuesday morning. My project started with this doll form that I purchased at Tuesday Morning.

My next step in the process was to figure out what type of style I wanted this doll to have. I wanted to have a distress vintage feel. I have always like antique and old rulers so I knew I wanted to have that element. I also wanted this project to relate with my style and personality as an artist. Here were the base materials used to develop the dress for the doll.

I decided I wanted to use tags with a paper and fabric element. So I attached fabric and old ledger paper to tags. I ended up making 60 tags to use to produce the dress in my project. I used adhesive to attach the fabric and ledger paper. I then sewed several of the tags with edged stitching on the journal tags to give that additional element.
I attached each tag to the doll by using a glue gun and alternated the tags to develop my pattern. I then added elements of embellishments and choose to use keys, gears and time pieces. Here are more pictures of my doll.


When going through the process and attaching tags I found as I edged further down the form I ran into where I had a gap between layering edges. So I had to figure out what to do that would bring the dress panels together. I then decided to take old wooden rulers and cut them to size and use those as my seam to bring the panels of the dress together.
I hope you enjoy my dress project and this was a Christmas present I made for myself. This piece is proudly displayed in my studio and is used as a muse to help me with my creativity. This is one of my proudest projects to-date.
Thanks for stopping by my blog and I hope you enjoy. If you have any additional questions on this project let me know.
Thanks,
Trent
2013 Christmas card
Well this is third Christmas I have made homemade cards. I have a love for snowmen and wanted to make a card that exhibited one as the focal point.
This past year Tim Holtz introduced an assembled snowmen sizzix die. I saw this die and had to have it.
This die is what I used to make my card and then added other elements to archive a vintage feel.


I hope you enjoy as I loved making them. This year it took me almost 70 hours to make 45 of them. I don't think I ever fully think about what it will take to complete them.
Thanks for stopping by my blog and have a festive holiday.
- Posted using BlogPress from my iPhone
Sunday, November 17, 2013
Sunday time to play and create
Well was so happy to find time today to be able to have time to create. I had been wanting to make this tag that would utilize many different elements and textures.


For this project I utilized of course mostly tim holtz product. Like that is an automatic known..lol
I first started with a #10 size tag that is made by Ranger Inkssentials - 4 1/8" x 8 1/2" tag - brown craft.
I then took some of Tim Holtz fabric and sewed this onto the tag. I then utilized several on the edge dies from Tim Holtz and stains to create the following tag.
I then of course used a lot of embellishments to finish this project off.
I hope you enjoy and thanks for stopping by my blog.
Trent
Friday, November 15, 2013
Nov tim holtz 12 tags 2013
Here is my tag made for Nov 12 tags 2013. This was a technique that tim taught in creative chemistry 2.

I wasn't sure at first if this technique I would use much. But is warming up to me now. Love the dimension and look it achieves.
Thanks for stopping by my blog
- Posted using BlogPress from my iPhone

I wasn't sure at first if this technique I would use much. But is warming up to me now. Love the dimension and look it achieves.
Thanks for stopping by my blog
- Posted using BlogPress from my iPhone
Tuesday, November 12, 2013
Nancy canvas 2013
Here is the canvas I made for Nancy in a swap.

So glad she loved. I used several techniques in the canvas learned fromTim Holtz creative chemistry 102 class.
- Posted using BlogPress from my iPhone

So glad she loved. I used several techniques in the canvas learned fromTim Holtz creative chemistry 102 class.
- Posted using BlogPress from my iPhone
Thanksgiving 2014 card
Here is my 2014 thanksgiving card I made and sent out for this year.
I used several of Tim Holtz great products to create this card and layout.

Hope you enjoy.
- Posted using BlogPress from my iPhone
I used several of Tim Holtz great products to create this card and layout.

Hope you enjoy.
- Posted using BlogPress from my iPhone
Wednesday, October 30, 2013
GCD/CARTA BELLA Kit - Tag Design project
Happy Wednesday (hump day) to all....
Tonight I decided to work on another design project and I couldn't decide whether to do a tag or a card. Then the idea hit me to make a tag. I used the GCD kit that can be purchased on www.violetdivinescrapbooking.com.


In this project I utilized the following items that can be found in the kit:
These items were from the Embellishment Ad On GCD/Carta Bella kit
I also added in some items from my personal stash of Tim Holtz products to finish off the piece.
I hope you like this tag I made and if you have questions let me know.
Have a great day and thanks for stopping by my blog...
Trent
Tonight I decided to work on another design project and I couldn't decide whether to do a tag or a card. Then the idea hit me to make a tag. I used the GCD kit that can be purchased on www.violetdivinescrapbooking.com.


In this project I utilized the following items that can be found in the kit:
- 1 sheet of the CARTA BELLA Script & Scribbles paper
- part of the Core'dinations Card Stock Black Soot
These items were from the Embellishment Ad On GCD/Carta Bella kit
- the typewriter sticker from the Carta Bella - So Noted Element Sticker pack
- three of the wood envelope decorative embellishment made by Prima
I also added in some items from my personal stash of Tim Holtz products to finish off the piece.
I hope you like this tag I made and if you have questions let me know.
Have a great day and thanks for stopping by my blog...
Trent
Monday, October 28, 2013
Halloween Tag 2013 - Apothecary
Happy Monday Everyone! I hope everyone has a spooktacular time this week. Halloween is fast approaching and I decided that I wanted to make my very own tag this year for Halloween.
My inspiration first started with a tag that I saw Shelly Hickox Apothecary tag she made using Tim Holtz and Wendy Vecchi in her design.
Well here is a tag I made that utilized several of Tim Holtz dies, stains, paints and distress glitter.


I really enjoyed making this tag and thank Shelly for the inspiration to make this one.
Hope everyone has a great week and happy haunting.
Trent
Tuesday, October 22, 2013
Card Design Project - GCD/Carta Bella Kit
Happy Tuesday! I hope everyone is enjoying there week and finding time to do some crafting.

I wanted to share another card design project I completed for Violet Divine Scrapbooking. I designed this card using the GCD/Carta Bella Kit.
Here is what I used from the kit when making this card:
For this design project I started out cutting the Core'dinations Card Stock black soot to 10x7. Then folded the card stock in half to give me a 5x7 card.
I then cut the Core'dinations Card Stock Tumbled Glass and CARTA BELLA-antique silhoetts paper to desired size for layering effect.
I attached the Tumbled Glass paper to the card stock with adhesive. Before attaching I scored the sides and distressed out the edging with Black Soot Distress Ink.
I then took the antique silhoetts paper and distressed out the edges with black soot distress ink. I then wrapped the black lace around the top and bottom of the patterned paper. Then I adhesive that onto the Tumbled glass.
I then cut out the Ornate Frame with Core'dinations Card Stock with black soot. I then roughed up the edges and accented with Evergreen Bough Distress ink.
I attached that to the card stock and then added additional elements to accent the piece with stickers from the CARTA BELLA sticker sheet and added a lace bow with a floral accent.
Thanks for stopping by my blog and I hope you enjoyed this project.
Trent

I wanted to share another card design project I completed for Violet Divine Scrapbooking. I designed this card using the GCD/Carta Bella Kit.
Here is what I used from the kit when making this card:
- Black Lace
- 1 - sheet of CARTA BELLA-antique silhouetts
- 1 - sheet of Core'dinations Card Stock Black Soot
- 1 - sheet of Core'dinations Card Stock Tumbled Glass
- CARTA BELLA stickers
- Tim Holtz - Ranger - Black Soot Distress Ink
- Tim Holtz - Ranger - Evergreen Bough Distress Ink
- adhesive, glue dots, scissors and sand paper
- Tim Holtz - Sizzix - Alterations - Ornate Frame Die - #658720
For this design project I started out cutting the Core'dinations Card Stock black soot to 10x7. Then folded the card stock in half to give me a 5x7 card.
I then cut the Core'dinations Card Stock Tumbled Glass and CARTA BELLA-antique silhoetts paper to desired size for layering effect.
I attached the Tumbled Glass paper to the card stock with adhesive. Before attaching I scored the sides and distressed out the edging with Black Soot Distress Ink.
I then took the antique silhoetts paper and distressed out the edges with black soot distress ink. I then wrapped the black lace around the top and bottom of the patterned paper. Then I adhesive that onto the Tumbled glass.
I then cut out the Ornate Frame with Core'dinations Card Stock with black soot. I then roughed up the edges and accented with Evergreen Bough Distress ink.
I attached that to the card stock and then added additional elements to accent the piece with stickers from the CARTA BELLA sticker sheet and added a lace bow with a floral accent.
Thanks for stopping by my blog and I hope you enjoyed this project.
Trent
Monday, October 21, 2013
GCD/Carta Bella Kit - Birthday Card Design project
Happy Monday everyone! I wanted to share my design project made using product from the GCD/Carta Bella Kit. This is a birthday card I designed utilizing paper found in the kit that can be purchased on www.violetdivinescrapbooking.com.

When making this card I used 1-sheet Core'dinations Black Soot Card stock and three styles of the patterned GCD/Carta Bella paper.
I then completed an alcohol ink technique that I learning from Tim Holtz Creative Chemistry 102 class - Alcohol Ink Technique: Monoprint.
I then used a stamp from Tim Holtz blue print stampset for birthday's. An stamped this on top of the technique done with alcohol inks.
An then stamped the cupcake stamp again and used Tim Holtz distress markers to color in the stamped image.
Once done I cut the cupcake out and pop dotted it on top of the stamped image to give it a raised effect.
Then I used some of the pink ribbon provided in the GCD kit to create a bow and stamped a happy birthday saying to finish the card off.
Thanks for stopping by my blog and have a great week.
Trent
Sunday, October 20, 2013
GCD Kit - Canvas Design Project
I wanted to share a design project that I have made using the GCD/Carat Bella Paper and Main Kiti Embellishments. This kit can be found on www.violetdivinescrapbooking.com.
This kit has so much to offer and provide to any crafter that buys the kit..
Here are some pictures of the canvas that I designed when using this kit.
Items used in project from kit:
Items used not contained in the kit-


This kit has so much to offer and provide to any crafter that buys the kit..
Here are some pictures of the canvas that I designed when using this kit.
Items used in project from kit:
- Prima Wood Doors
- Petaloo Flora Doodles Darjeeling Mini Mix -8 pc flowers
- 1 sheet - 12x12 - Core'dinations Card Stock Tubled Glass
- 1 sheet - 12x12 CARTA BELL-A antique silhouetes
- 1 sheet - 12x12 CARTA BELL-A tiny lace
- 1 sheet - 12x12 GCD -Charleston-starry-night
- 1 Prima Vintage Trinket - this was out of the Embellishment Ad On GCD/Carta Bella pkg
- some of the Petaloo Darjeeling Medium Mix flowers - this was out of the Flower Ad On GCD/Carta Bella pkg
Items used not contained in the kit-
- Adhesive, glue dots, glossy accents (Inkssentials Ranger)
- Gathered Twig Distress stain
- Tim holtz embellishments - from my stash
- 12x12 sheet of chip board
- 12x12 canvas
- brown archival paint, evergreen bough distress paint
- sander, scraper, scissors, pick
- Sewing Machine, needle and thread


I hope you enjoyed this design project and thanks for stopping by my blog. I will be working on several other design projects this week utilizing the GCD kit. So keep an eye out for more posts later in the week.
Thanks and have a great week everyone!!
Wednesday, October 16, 2013
Tim Holtz - Creative Chemistry 102 - Day 5 - Embossing Effects
Day 5 - the last day of Creative Chemistry 102 - so sad...learning so much... In Day 5 Tim discusses the versatility of embossing powders. The techniques that he teaches are Rusting, Sticky Powder, Shabby Chic, Tarnished Silver, and Chalkboard.
I haven't been one yet to venture to much into using embossing powders in my work. So today's class really benefited me as an artist as it has opened my eyes to more techniques. It is great to see such versatility and adaptability that can be used by embossing.
Day 5 - the final day of class - very sad...CAN'T wait for Creative Chemistry 103...(just saying Tim bring it on..LOL)


Well this is the last of my posting of what I created from watching Tim's class and techniques shared/taught.
I hope you have enjoyed. If you haven't been a student of Creative Chemistry 101 and/or Creative Chemistry 102 I HIGHLY suggest it. You will learn so much and expand your reach, capabilities and creative flare as an artist by doing these classes.
Thanks for stopping by my blog and have a great one! Trent
I haven't been one yet to venture to much into using embossing powders in my work. So today's class really benefited me as an artist as it has opened my eyes to more techniques. It is great to see such versatility and adaptability that can be used by embossing.
Day 5 - the final day of class - very sad...CAN'T wait for Creative Chemistry 103...(just saying Tim bring it on..LOL)
- First Technique - Rusting with Distress Powder Technique - Loved this technique and real cool way to give your die cut an authentic touch.
- Second Technique - Sticky Powder with Glitter Technique- Okay this technique is the BOMB. I event took metal embellishments and completed the technique on them. SO COOL...

- Third Technique - Sticky Powder with Leafing Technique- I wasn't able to complete this technique is don't have leafing. So once I get leafing I will post.
- Fourth Technique - Shabby Chic Technique

- Fifth Technique - Tarnished Silver Technique - Okay Shelly Hickox this is an awesome technique Tim showed us...THANKS!!

- Sixth Technique - Chalkboard Technique

Well this is the last of my posting of what I created from watching Tim's class and techniques shared/taught.
I hope you have enjoyed. If you haven't been a student of Creative Chemistry 101 and/or Creative Chemistry 102 I HIGHLY suggest it. You will learn so much and expand your reach, capabilities and creative flare as an artist by doing these classes.
Thanks for stopping by my blog and have a great one! Trent
Day 2 - Creative Chemistry 102 - Embossing with Stencils Technique
So I was finally able to complete a technique I had been wanting to try out. I had to wait till I got the needed supplies to make my tag. This is one of my favorite things learned in Creative Chemistry 102. Hell I cant just pick one as there are to many.
I wanted to share this tag I designed and made by featuring this technique.

Now onto completing Day 5 of Creative Chemistry 102 - now that I have all the supplies I need. Had to wait for my shipment of products purchased from Simonsaysstamps.com.
I hope you enjoy my tag and thanks for stopping by my blog. Have a great night!
Monday, October 14, 2013
Tim Holtz - Creative Chemistry 102 - Day 4 - Alcohol Inks
Day 4 of Creative Chemistry 102 - taught by Tim Holtz. Day 4 is one that ventured into an area that I haven't used this element very much in my art pieces. The focus was alcohol inks. Tim discusses alcohol inks and their properties. Tim is such a great instructor. He is always very informative and provides an good amount of detail when instructing (teaching).
The techniques he taught in Day 4 of Creative Chemistry were - Faux Patina, Tinted Tinsel, Ombre, Monoprint, and Faded Layers.
Day 4 - Let's get started...


I have found a great attraction to using alcohol inks through learning these techniques in Day 4 of Creative Chemistry I will be doing it now. LOVED WHAT I HAVE LEARNED. I would say that the biggest thing learned is working in a well ventilated room is KEY.
Hope you enjoy my tag creation made when learning these techniques. Can't wait to use this in some of my upcoming art pieces in the very near future.
Thanks all! Have a great night...Trent
The techniques he taught in Day 4 of Creative Chemistry were - Faux Patina, Tinted Tinsel, Ombre, Monoprint, and Faded Layers.
Day 4 - Let's get started...
- First Technique - Faux Patina Technique - This was a really cool technique that you utilized various colors (blues/greens) of Adirondack Alcohol Ink to a metal element. SO COOL...

- Second Technique - Tinted Tinsel Technique - I like how you can make the tinsel look vintage.

- Third Technique - Ombre Technique - this is really cool way to use alcohol ink and giving an awesome background. I am happy with my tag with on exception. One stamp smeared on me. However, I took the thing that Tim says all to often - Embrace Imperfection - to heart.

- Fourth Technique - Monoprint Technique - With today's class this is my # 2 favorite technique learned. Really like the effect this gives you. WAY AWESOME!!!
- Fifth Technique - Faded Layers Technique - This is my ultimate favorite technique that was taught today.

I have found a great attraction to using alcohol inks through learning these techniques in Day 4 of Creative Chemistry I will be doing it now. LOVED WHAT I HAVE LEARNED. I would say that the biggest thing learned is working in a well ventilated room is KEY.
Hope you enjoy my tag creation made when learning these techniques. Can't wait to use this in some of my upcoming art pieces in the very near future.
Thanks all! Have a great night...Trent
12 Tags of 2013 - Tim Holtz October Tag
Happy Monday all!
Tonight I finally got around to making the October 12 tags of 2013 by Tim Holtz. This tag was really cool to make as it actually incorporated a technique that Tim taught in Creative Chemistry 102 class.
The background of the tag utilized the technique of distress paint marbling and then we also accented the die cuts with distress glitter.
I really like the impact of this tag by the dimension, coloring and layering techniques. I used different die cuts than what Tim used in his instructions. One reason was that I didn't have the exact same die cuts...but still achieved the same cool effect.
Here is the my version of the October 12 tags of 2013 - October Tag.

I hope you enjoy. Thanks for stopping by my blog.
Sunday, October 13, 2013
October Floral Tag Swap
Well in the month of October I was in a floral tag swap. I ended up getting two partners to make tags for with the theme of floral. For each person I was paired with I wanted to be sure to make something that fit their personality.
The first tag I made I used the focal colors of blue and teal. She loves those colors and wanted to make a tag that had a vintage distress feel. I really like how this tag turned out.
 The second tag I made the them was focused on pink as the second paired partner loves that color. I wanted to give a very vintage feel with this floral tag and think I achieved quiet well.
 Thanks for stopping by my blog and I hope you enjoyed seeing what I created for this month swap.
What great fun it has been doing these swaps.
Your friend in the art of crafting, Trent!
The first tag I made I used the focal colors of blue and teal. She loves those colors and wanted to make a tag that had a vintage distress feel. I really like how this tag turned out.


What great fun it has been doing these swaps.
Your friend in the art of crafting, Trent!
Tag Design project - Prima Kit - Violet Divine Scrapbooking
Happy Sunday everyone, I have been working on several tag design projects today that utilizes the Prima Kit that can be found on www.violetdivinescrapbooking.com. The Prima Kit is at a price point of $29.50 and this is a bargain price.
I recommend you going to the store and checking out what great product is contained in this kit.
Here are two tags that I have designed today that utilizes the products in the Prima Kit.


I hope you enjoy these tags and thanks for stopping by my blog.
Have fun with your next craft project that you have planned.
Trent
Saturday, October 12, 2013
Tim Holtz - Creative Chemistry 102 - Day 3 - Distress Differently
Creative Chemistry 102 - Day 3 - Distress Differently
This day Tim discussed the Distress products and taught us some great techniques when using the distress product line.
The techniques that he taught during Day 3 of class were - Smudge Stamping, Brayering, Photo Tinting, Faux Cracked Glass, and Glittering...
DAY 3 - Boy this day was such great fun!!


Stay tuned for Day 4...It is taking me longer to get through this class than most as I am fitting in the class in between work, craft project list and designing for Violet Divine Scrapbooking.
Good day all and happy crafting to each & everyone!!!
This day Tim discussed the Distress products and taught us some great techniques when using the distress product line.
The techniques that he taught during Day 3 of class were - Smudge Stamping, Brayering, Photo Tinting, Faux Cracked Glass, and Glittering...
DAY 3 - Boy this day was such great fun!!
- First Technique - Smudge Stamping Technique - This was a really cool technique. Not one I would of thought to even do.

- Second Technique - Brayered Stains Technique - I really like this technique and will be using it very soon in an upcoming project.

- Third Technique - Photo Tinting Technique -

- Fourth Technique - Faux Cracked Glass Technique

- Fifth Technique - Distress Glitter Rock Candy Technique - Very cool technique and fun tag
- Sixth Technique - Distress Glittering Technique - This is the first time I used the glitter and really like how this looks. The fact that you can distress over the glitter is so cool. Allows for further dimension in the elements of your project/tag.

Stay tuned for Day 4...It is taking me longer to get through this class than most as I am fitting in the class in between work, craft project list and designing for Violet Divine Scrapbooking.
Good day all and happy crafting to each & everyone!!!
Tim Holtz - Creative Chemistry 102 - Day 2 - Layering Stencils
Tim Holtz - Creative Chemistry 102 - Day 2 continued. In this session Tim Holtz discusses stencils and techniques when using stencils. We are taught Layering, Embossing, Stamping, Sketching, Monoprint.
DAY 2 - Creative Chemistry 102 here we go!!


This day was so much fun but I wasn't able to complete all the techniques as I have to wait to get my products I purchased on SimonSaysStamps.
Thanks for stopping by my blog and checking out what I made in based on Day 2 of Creative Chemistry 102 taught by Tim Holtz. This continuation of Creative Chemistry is so awesome and I am enjoying it so much!!!
Thanks all!
Trent
DAY 2 - Creative Chemistry 102 here we go!!
- First Technique - Mixed-Media Layering Technique

- Second Technique - Embossing with Stencils Technique

- Third Technique - Embossing through Stencils

- Fourth Technique - Stencil Stamping Technique

- Fifth Technique - Stencil Sketching Technique

- Sixth Technique - Ink Monoprint Technique

- Seventh Technique - Paint Monoprint Technique\

This day was so much fun but I wasn't able to complete all the techniques as I have to wait to get my products I purchased on SimonSaysStamps.
Thanks for stopping by my blog and checking out what I made in based on Day 2 of Creative Chemistry 102 taught by Tim Holtz. This continuation of Creative Chemistry is so awesome and I am enjoying it so much!!!
Thanks all!
Trent
Subscribe to:
Posts (Atom)